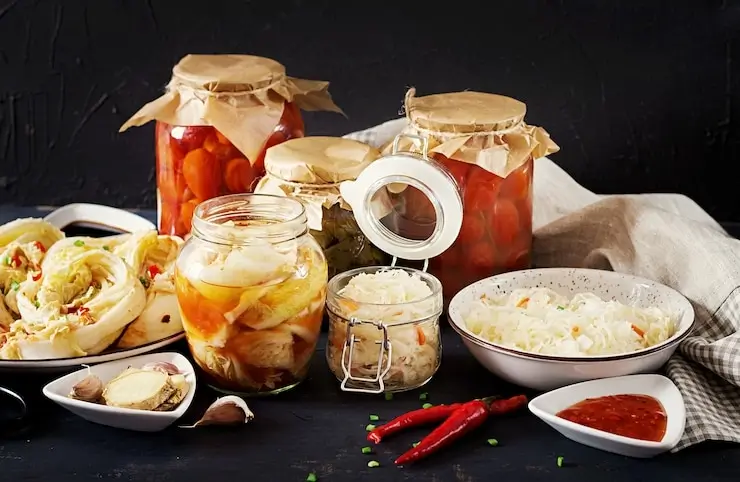
Souring or fermentationas it is commonly referred to is one of the oldest methods of food preservation as well as increasing the quality and the nutrient contents of food. It has its origins thousands of years ago and these revolutions turn basic items into neon colors of tangling goodies full of probiotics and nutrients. Regardless of whether one’s aim and passion is in preparing kitchen delights like sauerkraut or pickles, or in using safe and guided known techniques to come up with fairly exotic fermented vegetable mixtures, the process is not only one that is both fun and safe to prepare as well as enjoyable to partake in.
In this guide, you will learn about choosing the produce to make homemade ferments and even some things that you may encounter in the process.Regardless of whether you are an expert in food and Cooking or you have never considered it before today and you are thinking of trying out Fermentation Recipes, all the information you need for this process will be provided here.
Now let us concentrate on certain practices of the process of fermentation and get tasty and healthy end products! Here is a detailed definition of each move toward the natively constructed maturation process, focusing on Fermentation recipes for beginners’ vegetables: Below you see a depiction of the myriad of stages of homemade maturation with particular stress on fermenting vegetables: I have 20 years of experience in cooking. So you can trust me.
Step 1: Choose Your Vegetables
Definition: Choose fine-quality vegetables that are perfect for Homemade fermentation recipe food. Common options include:
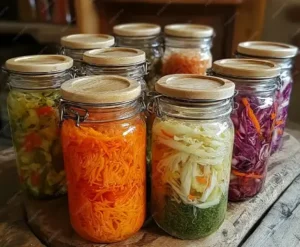
Cabbage: Used for sauerkraut.
Carrots: Can be Lacto-Fermentation Recipes whole or cut into sticks.
Cucumbers: Ideal for making pickles.
Radishes: Adds a spicy flavor.
Beets: Offers a sweet, earthy taste.
Step 2: Gather Your Ingredients
Definition: Here gather some of the ingredients required by the Best homemade fermentation recipe process as follows Here are some of the necessary ingredients, needed by the process of fermentation as follows
Salt: Sea salt kosher salts or any iodized salt such as Morton’s iodized salt should be avoided since they help to foster the process of Fermented food recipes Indian not inhibit it.
Water: As much as possible it is recommended to use filtered or distilled water because it has chlorine or some other compound.
Optional spices/flavorings: The ingredients that can help in the production of the particular flavor can be garlic, dill, peppercorns, or mustard seeds.
Step 3: Prepare Your Vegetables
Definition:Wash and chop the vegetables so that they undergo the process of Homemade Fermentation. This involves:
Washing: Rinse the vegetables properly with water to help wash off the dirt and pesticides if any are present.
Chopping/Slicing/Shredding: Make vegetables be chopped into the required shape and size as it influences the texture of the final product as well as the rate at which it ferments For example by chopping cabbage into thin pieces the sauerkraut fermentation crock process will be faster.
Step 4: Create a Brine
Definition: Prepare a saltwater solution to preserve the vegetables and encourage the Fermented mixed vegetables recipe. The basic ratio is:
The proper amount given is one tablespoon of salt to every cup of water. Stir until the salt is incorporated well with the vegetable oil. So, this brine will also contribute towards making the Fermented food recipes for the gut health process produce an anaerobic environment that is suitable for healthy bacteria.
Step 5: Pack Your Jar
Definition: Add the prepared vegetables to an empty clean glass jar or a fermented red bean curd
crock:
Tightly pack: This should be done to avoid the exhaustion of a lot of air space that hastens the rate of crop decay.
Add brine: In the above prepared brine pour it over the vegetables and ensure that all the vegetables are immersed in the brine all through. It is therefore advisable to make some space at the top of the container in case some sort of DIY Fermented Vegetables Recipe foods process occurs.
Step 6: Weigh Down the Vegetables
Definition: Use weights to keep the vegetables submerged in the brine, preventing exposure to air. Options include:
Fermentation weights: Specifically designed for this purpose.
Small jars: Fill with water to act as a weight.
Clean stones or plastic bags: Can also be used to keep vegetables below the brine.
Step 7: Cover the Jar
Definition: Protect the jar while allowing gases to escape during fermentation:
Cloth or coffee filter: Place a piece of cloth or nylon over the jar making sure that you tie it with a rubber band to avoid the entry of dust or insects.
Fermentation lid: If available, this can regulate pressure while keeping the environment sealed.
Step 8: Ferment
Definition: Allow the mixture to ferment in a suitable environment:
Temperature: Per the manufacturer’s advice, keep it in a cool dry place with a stable temperature preferably in the range of 60-75°F, 15-24°C.
Fermentation time: Monitor the fermentation, which can range from:
Sauerkraut: 1-4 weeks
Pickles: 1-3 weeks
Daily checks: Ensure vegetables remain submerged and taste periodically to gauge flavor development.
Step 9: Taste and Store
Definition: Once the desired flavor is achieved, store the fermented pickles vegetables:
Refrigeration: Please transfer the jar to the refrigerator to slow sauerkraut fermentation jar. It also has the effect of reducing the spoiling process and the quality of the food that is being transported such as the flavor of the food, and texture being preserved.
Shelf life: If properly stored the ferments can last for several months in the refrigerator and the tastes would differ as ferments.
Step 10: Enjoy!
Definition: Incorporate your homemade fermented vegetables into meals. They can be enjoyed in various ways:
Salads: Add to fresh salads for crunch and flavor.
Sandwiches: Use as a tangy topping.
Side dishes: Serve alongside main courses for added nutrition.
Tips for Success
Cleanliness: Make sure that all the tools and jars do not remain blunt because that may cause a lot of problems.
Experimentation: Experiment with the kind of spices to put into the vegetables and the varieties of vegetables to use.
Mold management: If mold appears, it is necessary to remove it with the respective vegetables, but the submerged part is still ok.
Dissolving the salt in water for example may seem like an easy and simple process but following the detailed definitions of each step as described here will help you understand the fermented food recipes
process much better and you’ll be on your way to preparing homemade fermented sauerkraut foods!
Tips for Success (Continued)
Tips for Success (Continued)
Temperature Control:
Fermentation encourages stable, cool temperatures Conditions for carrying out fermentation include; If the temperature in your kitchen is too high then it is possible to over-ferment the beer thus resulting in the production of wrong flavors. On the other hand, a temperature range that is too low will somewhat slow the fermentation process. Consider changing your surroundings in a given environment.
Experiment with Flavors:
You can also try to incorporate a lot of spices, herbs, or even other foods such as chilies or ginger into your ferments to further season the food. This means that it can be an entirely new experience with the many flavors that each batch of wafer biscuits may have.
Small Batches First:
Beginners in fermented food recipes for gut health processes should begin with small portions to avoid great loss while at the same time practicing different ideas and methods. By doing this you can be able to modify the quantity produced according to your preference without having to produce many at once.
Keep a Journal:
Be sure to record the recipes you used, the concentration of brine, the time you used to fermented red cabbage the food, and the taste of each experiment you carried out. This will help you to achieve better batches that have been done before and also change the bad ones if any.
Troubleshooting Common Issues
Troubleshooting Common Issues
Mold Formation:
Cause: Mold can form if vegetables are not fully submerged in brine.
Solution:Remove any visible mold and the affected vegetables. Ensure everything is submerged. In most cases, the remaining ferment is still safe to consume.
Off Flavors:
Cause: Ferments can develop off-flavors due to temperature fluctuations or exposure to air.
Solution: Monitor the low-fermentation diet recipe environment closely. If you detect off-flavors, it may be best to discard the batch and start fresh.
Bubbling and Foam:
Cause: Some bubbling and foam are normal during fermentation as gases are released. Solution: If the foam rises above the brine, carefully skim it off. Ensure that the vegetables remain submerged.
Too Salty or Not Salty Enough:
Cause: Incorrect salt ratios can affect taste and texture. Solution: Adjust the salt in future batches based on your preference. Generally, 2-3% salt (by weight) is a good starting point for vegetable ferments.
Fermentation Takes Too Long:
Cause: Temperature: One of the factors that can affect the rate of fermentation is temperature and in particular low temperature retards the process. Solution: If the fermentation looks stuck, then it is advised to move it to a warmer environment yet avoid temperatures touching 75 F / 24 C.
Vegetables Becoming Soft:
Cause: Over-fermentation or too much heat can lead to mushy vegetables. Solution: Monitor your batches closely and consider using a firmer vegetable or adjusting the fermentation time.
Enjoying Your Ferments
Once you have successfully fermented your vegetables, here are some delicious ways to incorporate them into your meals: Once you have successfully sauerkraut recipe your vegetables, here are some delicious ways to incorporate them into your meals:
In Salads: Add fermented vegetables to salads for a crunchy, tangy boost.
On Sandwiches: Use as a topping on sandwiches or burgers for extra flavor and texture.
With Proteins: Serve alongside grilled meats or fish to enhance the meal.
As Snacks: Enjoy them straight out of the jar for a healthy snack.
In Dips: Blend fermented beet veggies into dips or spreads for added complexity.
Final Thoughts
Final Thoughts
It is healthier and awesome to create homemade sauerkraut vegetables because empower your food with nutrition and flavor. Soon you will get more confident in the process and realize your top preferences in terms of flavors and approaches. Do not forget to offer your preparations to friends and kin since they will enjoy the new tastes that you have generated!
Happy fermenting! Have fun and the goodness of the food products that come out of the process!
Conclusion
Fermentation at home is not only a technique of how to preserve food but it is a trip that one takes in the world of flavors, health, and innovation. When sauerkraut Skills fresh vegetables are converted into feisty and tasty food products with good bacteria provision, one is not only improving the meal but also carrying forward a tradition that has been as old as cookery.
Hence, in this guide, you’ve got an overview of the basic procedures that you need for fermenting vegetables: Preparing, bringing, and storing. Over time, one gets to master his or her culinary and garnishing style, and this will be an added advantage because one will be in a position to try various mixtures of foods and spices.
Just a reminder, the process of mortier pilon fermentation crock was named for what we get in the end. Enjoy the occasional screw-ups and use them in your favor, treat yourself to your accomplishments. Drinking it with snack foods, using it in salads, or with the main course, you will discover that homemade ferments add that sought-after zing to the meal.
So prepare your environment, wash your hands, and start exploring the wonderful world of making sauerkraut products. Have fun and cheers on the process, happy fermenting!
FAQs About Homemade Fermentation
What is fermentation, and how does it work?
Fermentation is a process of breakdown of organic molecules such as sugars under conditions of low or no oxygen in the presence of fermenting organisms such as yeast or bacteria and this results in the production of acids, gases, or alcohol. This process also adds value to the food since it helps extend shelf life while at the same time improving the quality of the food in terms of taste and nutrient composition.
What types of foods can be fermented?
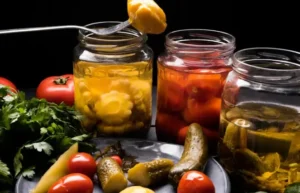
Many foods can be fermented beans, including:
Vegetables: Sauerkraut, kimchi, pickles
Dairy: Yogurt, kefir, cheese
Beverages: Kombucha, fermented fruit juices
Grains: Sourdough bread
Legumes: Fermented beans or lentils
What are the health benefits of fermented foods?
Fermented veg foods offer several health benefits, including:
Improved digestion and gut health due to probiotics
Enhanced nutrient absorption
Strengthened immune system
Potential mood improvements linked to gut health
Do I need special equipment for fermentation?
While some specialized equipment can be helpful, basic fermentation can be done with common kitchen items such as:
Glass jars (mason jars work well)
Weights to keep food submerged
An airlock for anaerobic fermentation
A thermometer to monitor temperature
How long does the fermentation process take?
The fermentation time varies depending on the type of food and environmental conditions. For example:
Sauerkraut: 1-4 weeks
Kimchi: 1-2 weeks
Kefir: 24-48 hours
Kombucha: 7-14 days
I have a question nay for some people the answer is obvious, I would like to know how I know when my food is properly fermented.
Taste is the most precise command you can use to tell if your food is ready or not. You should look out for a pleasing level of sourness as well as the texture. Also, the fermentation process should add a good smell to the bacon.
What should one do if he or she finds mold on the fermented foods?
If there is mold formation on the lefse you can usually scrape off the mold and check under it for further spoilage. In case it is a small area that was affected then it is advisable to dispose of the affected portion. If for instance the whole batch is found to harbor mold or contains a pungent smell then the whole thing must be thrown away.
Are fermented foods safe for flavoring?
Absolutely! There are many ways you can try to add flavors after or during the process of fermentation which is after you get acquainted with the simple types of fermentation.
Are fermented foods good for consumption or rather dangerous for our health?
Generally, yes. In this case, if all the measures of food preparations are taken and followed, the fermented food should not be toxic and can be consumed if there are no signs such as foul smell and over-molding. Remember that if you are confused, your feelings are normally accurate.
Where should I put my fermented foods?
After the completion of the fermentation process make sure you keep your fermented foods in the refrigerator. This reduces the rate of fermentation and allows them to be kept for some time without being affected by the process. Many fermented foods usually can take months or even more of their shelf life if well preserved.
Is it possible to undergo fermentation without the use of Salt?
Most types of fermentations require the use of salt for instance in the preparation of vegetables because it forms a brine that rejects undesirable microorganisms. However, there are fermentation types that do not call for the use of salt, for instance, some types of dairy fermentation. Pay attention here as skipping salt may cause the food to go bad.
Are there some possibilities for fermenting with sugar substitutes?
Fermentation normally uses sugars for the microorganisms to survive and to carry out the fermentation process. Hitherto, some of the sugar substitutes yield some rather changes in the overall brewing process and the final product. Coconut sugar, for example, is encouraged to be avoided in favor of traditional sugars such as cane sugar, honey, or maple syrup.